|
|
||
|---|---|---|
| src | ||
| .env.example | ||
| .gitattributes | ||
| .gitignore | ||
| Dockerfile | ||
| README.md | ||
| package-lock.json | ||
| package.json | ||
| tsconfig.json | ||
README.md
| title | emoji | colorFrom | colorTo | sdk | pinned |
|---|---|---|---|---|---|
| oai-reverse-proxy | 🔁 | green | purple | docker | false |
OAI Reverse Proxy Server
Simple reverse proxy server for the OpenAI API.
What is this?
If you have an API key you want to share with a friend, you can use this to keep your key safe while still allowing them to generate text with the API.
Why?
OpenAI keys have full account permissions. They can revoke themselves, generate new keys, modify spend quotas, etc. You absolutely should not share them.
If you still want to share access to your key, you can put it behind this proxy to ensure it can't be used to do anything but generate text. You can also set a separate key on the proxy to gatekeep access.
How to use
1. Get an API key
- Go to OpenAI and sign up for an account.
2. Clone this Huggingface repository to your account
- Go to Huggingface and sign up for an account.
- Once logged in, click on the
+button in the top right corner and selectDuplicate this Space.
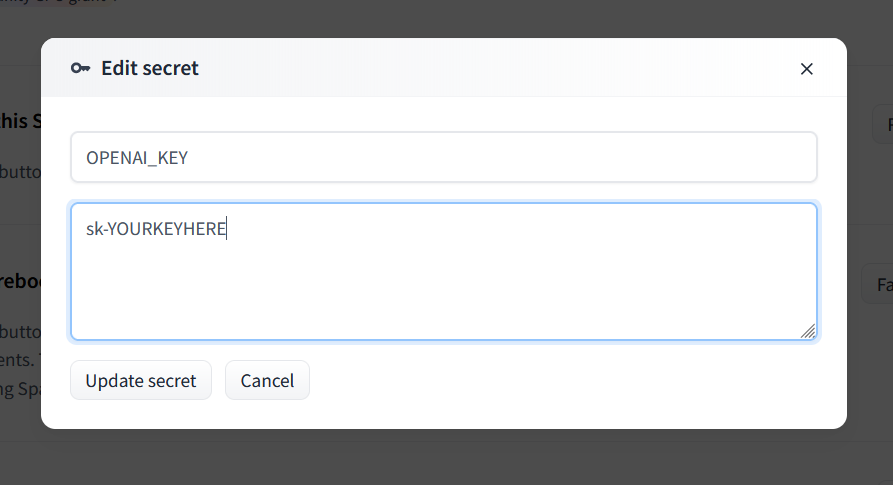
3. Set your OpenAI API key as a secret
- Click the Settings button in the top right corner of your repository.
- Scroll down to the
Repository Secretssection and clickNew Secret.
- Enter
OPENAI_KEYas the name and your OpenAI API key as the value.
Do not paste the key into server.js! That file is public and anyone can see it. Leave it alone; it will load the key from the secret you just created.
4. Deploy the server
- Your server should automatically deploy when you add the secret, but if not you can select
Factory Resetfrom that same Settings menu.
5. Share the link
- The Service Info section below should show the URL for your server. You can share this with anyone to safely give them access to your OpenAI API key.
- Your friend doesn't need any OpenAI API key of their own, they just need your link.
- However, if you want to protect access to the server, you can add another secret called
PROXY_KEY. This key will need to be passed in the Authentication header of every request to the server, just like an OpenAI API key.
Note: The keys section in the serverinfo screen may not correctly identify keys as trial/paid/GPT-4 unless you use the more advanced configuration described in .env.example.


